Showing posts with label MDF. Show all posts

Friday, 8 January 2021

Happy New Year!

Wow, I really lost track of the time there.

Things have been busy since August, hobby wise and in real life. 

Here’s a quick recap Of the hobby stuff:
Purchased:
( and built) 2 Aberdeen  class airships from Crossover Miniatures
16 French Foreigh Legion and  16 British Northwest Frontier from Artizan Designs (Christmas gift for myself from the family) for a VSF setting. 
Oathmark undead box and two metal blisters.
4 Tier one operators sets from Spectre (Christmas)
1500 3/8x3/4 foam bricks off of Etsy.
Ltd Edition GW Gamling on horseback.

Painted:
Received the rest of my 28mm 101st Airborne from Karl at Kura Creative
Oathmark Goblin Wolf Riders (only rider figures) metal heroes and resin Ltd edition hero painted by Karl at Kura Creative.
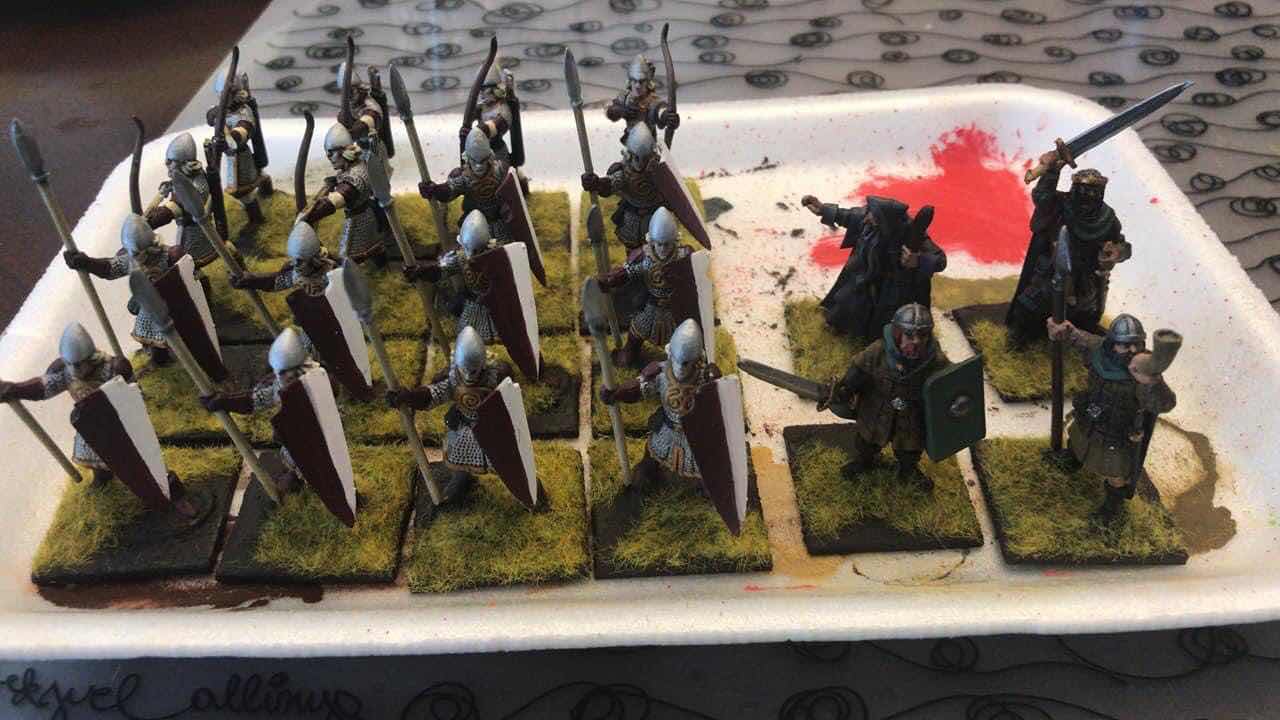
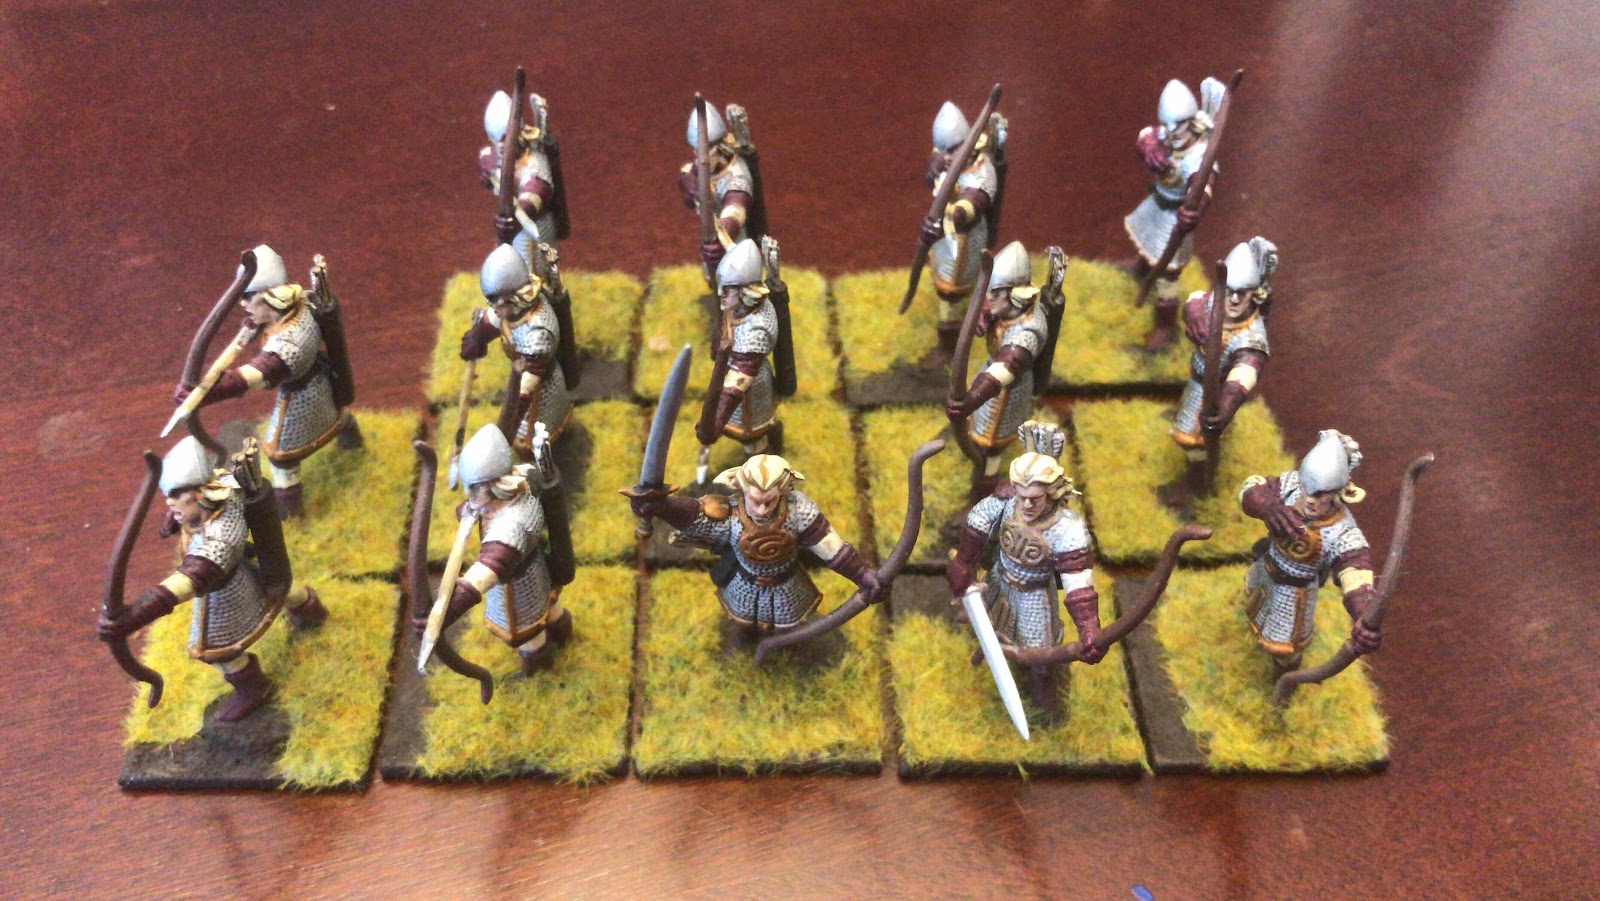
I finished 30 Oathmark Elves, 10 light Elves, 4 hounds, 4 humans and one necromancer. 


Why did I purchase 1500 3/8x 3/4 inch foam blocks? I hear you ask. Because it’s cheaper than buying a Proxxon foam cutter and I’m not burning time cutting foam blocks. The reason is Jeremy from Black Magic Craft (YouTube) posted a dope video on modular rules that I wanted to try. The results will follow in a separate post.

The plan for 2021: Major Projects

Continue plugging away with Oathmark
I have to built, Prime and paint the 30 plastic and 6 metal Undead figures from Oathmark.
Finish painting 30 Dwarf heavy infantry.
Base 30-40 Dwarf Infantry and 30-40 Goblin Infantry.
Paint 21 Wolves (for the painted riders to ride)
Base 27 Light Elves.

VSF project
Finish assembly (on one) and paint both Aberdeen airships (other is primed). 
Paint 14 FFL and 16 British NWF using sweet contrast paint scheme found on YouTube
Purchase rank and file British troops ( 7 packs of 4 figures from Artizan). Paint  them. 

Star Wars Legion (or Chain of Command) this is my nice to get to 3rd project.
Assemble Count Dooku, Anakin, box of B1 Battle Droids (omg the pieces!), and Phase I clone troopers.
Purchase Clone Wars starter set.
Paint them all.

Minor Projects:
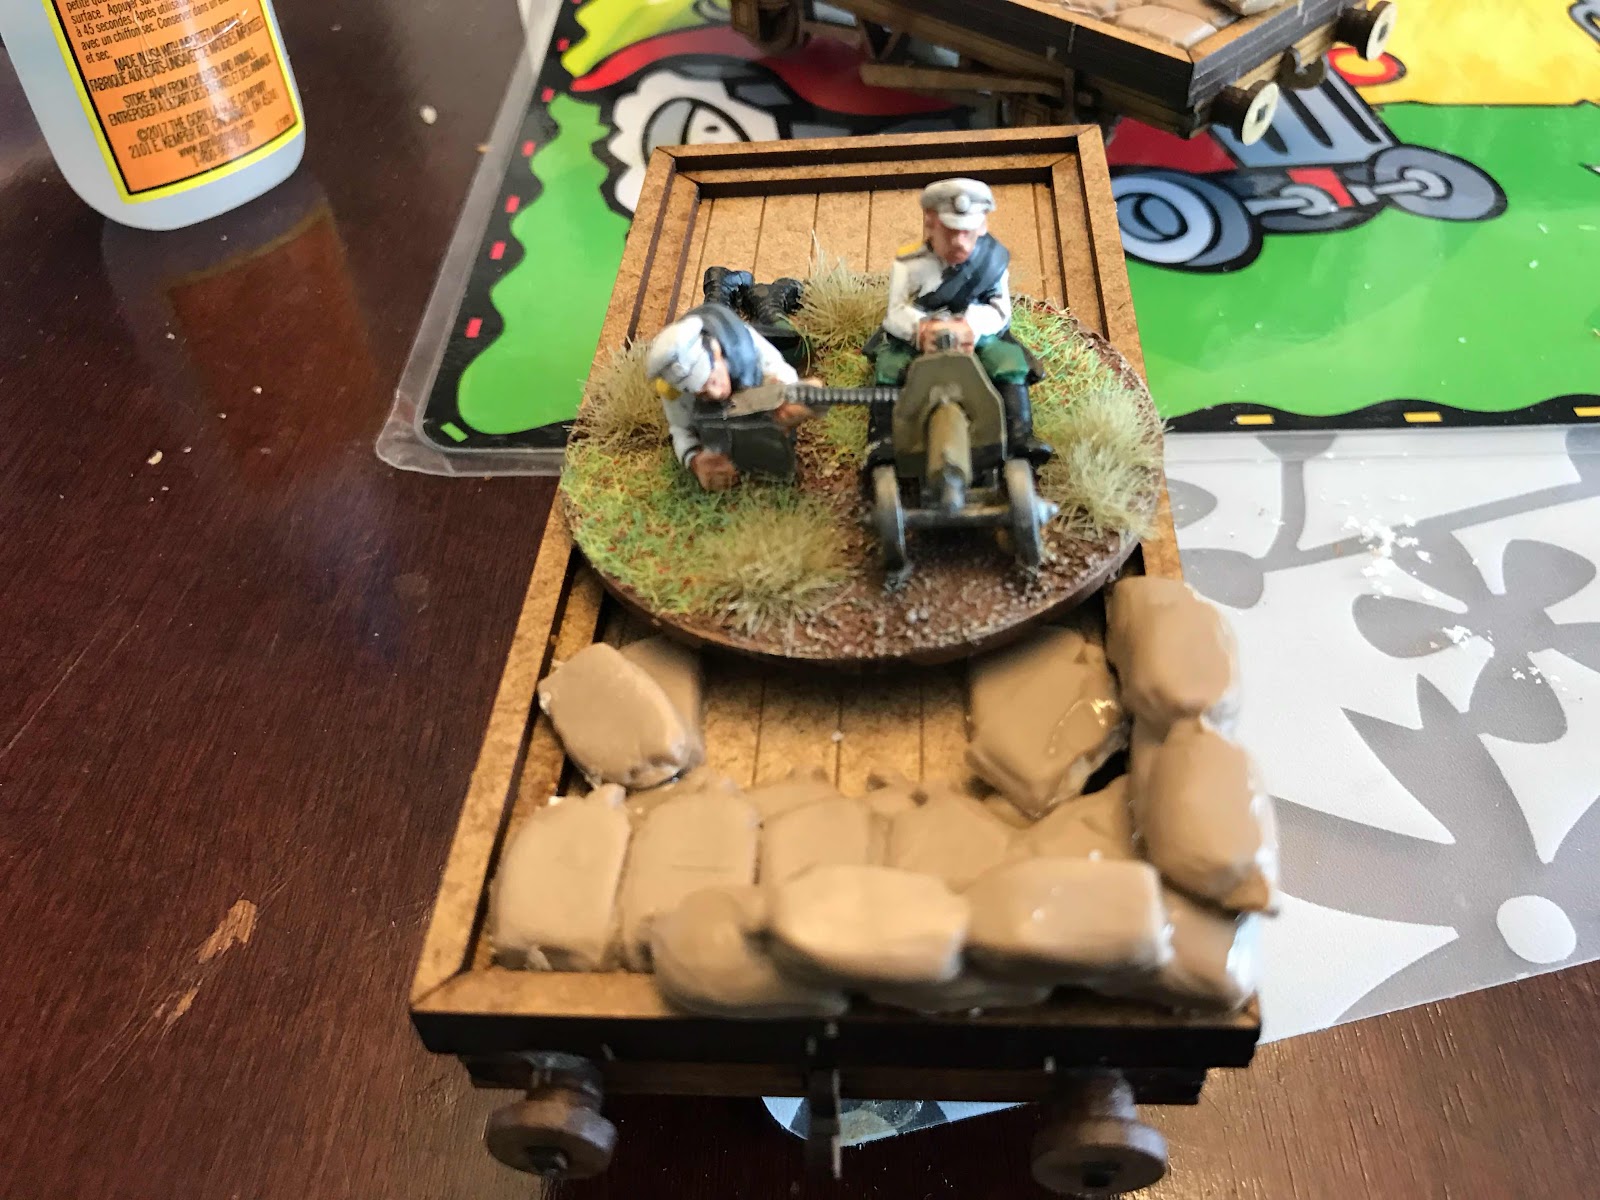
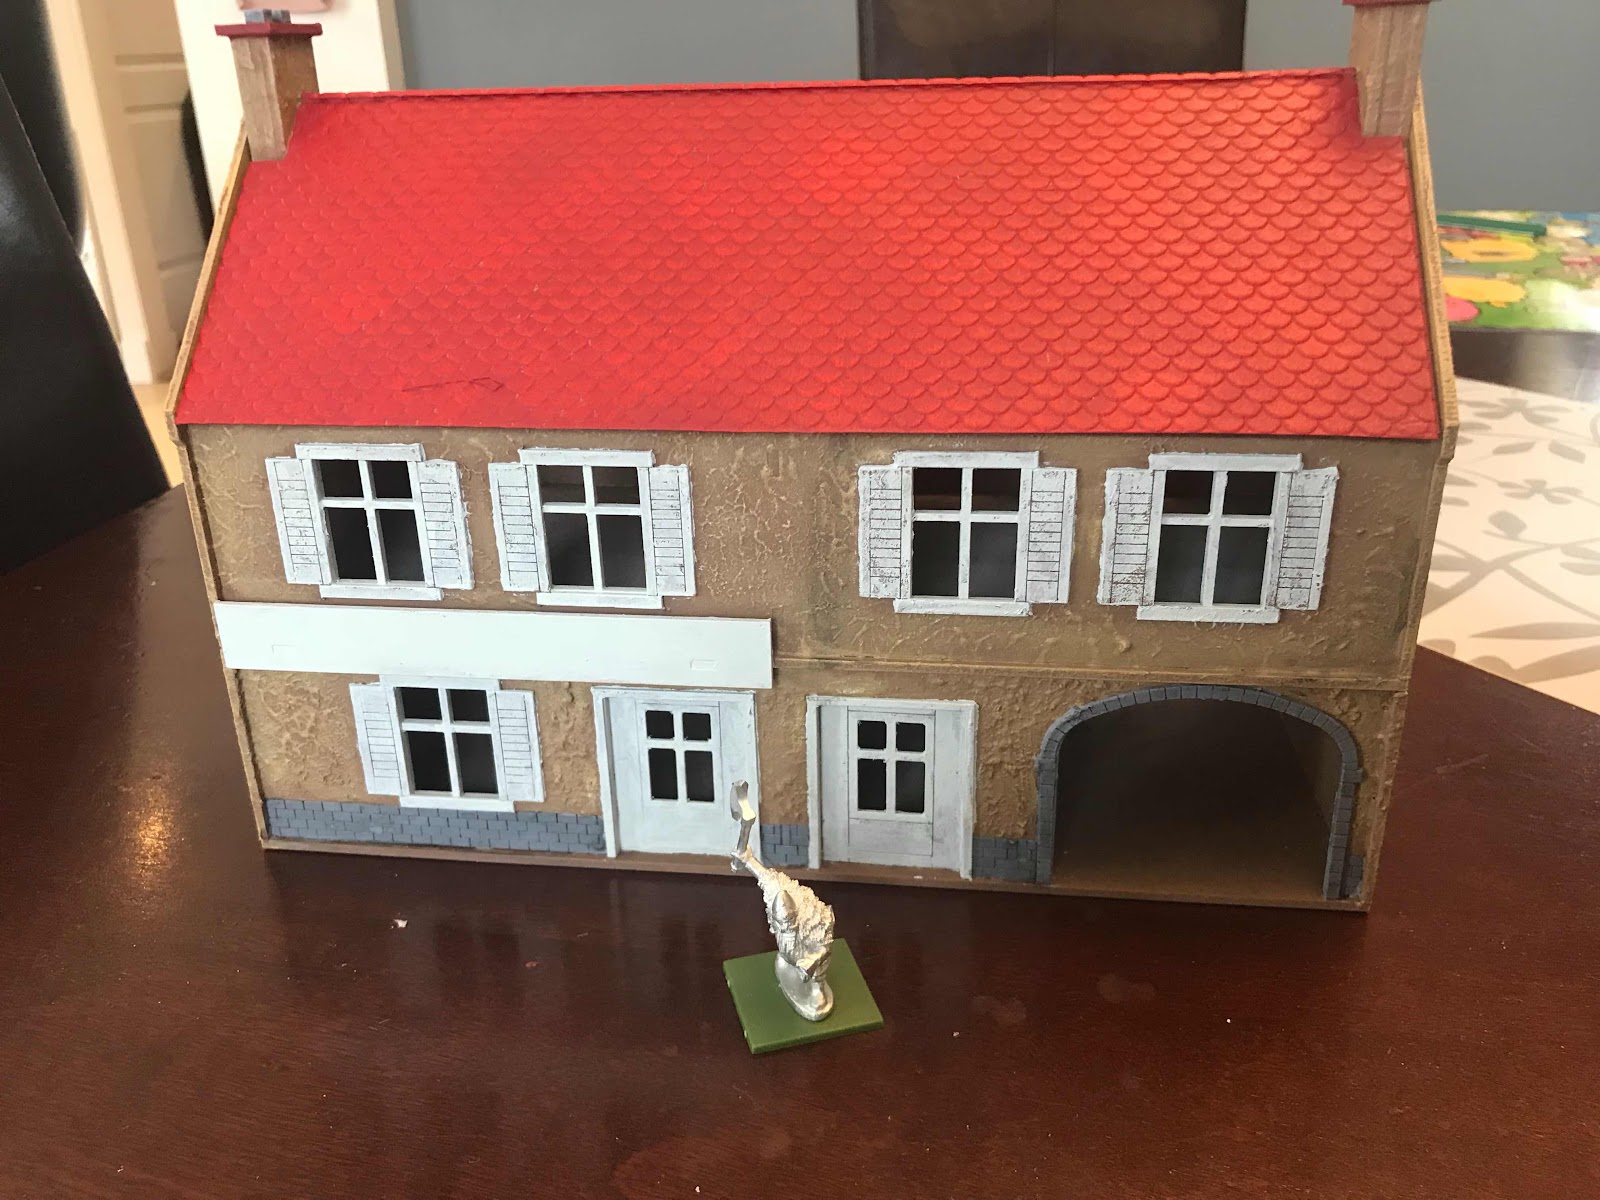
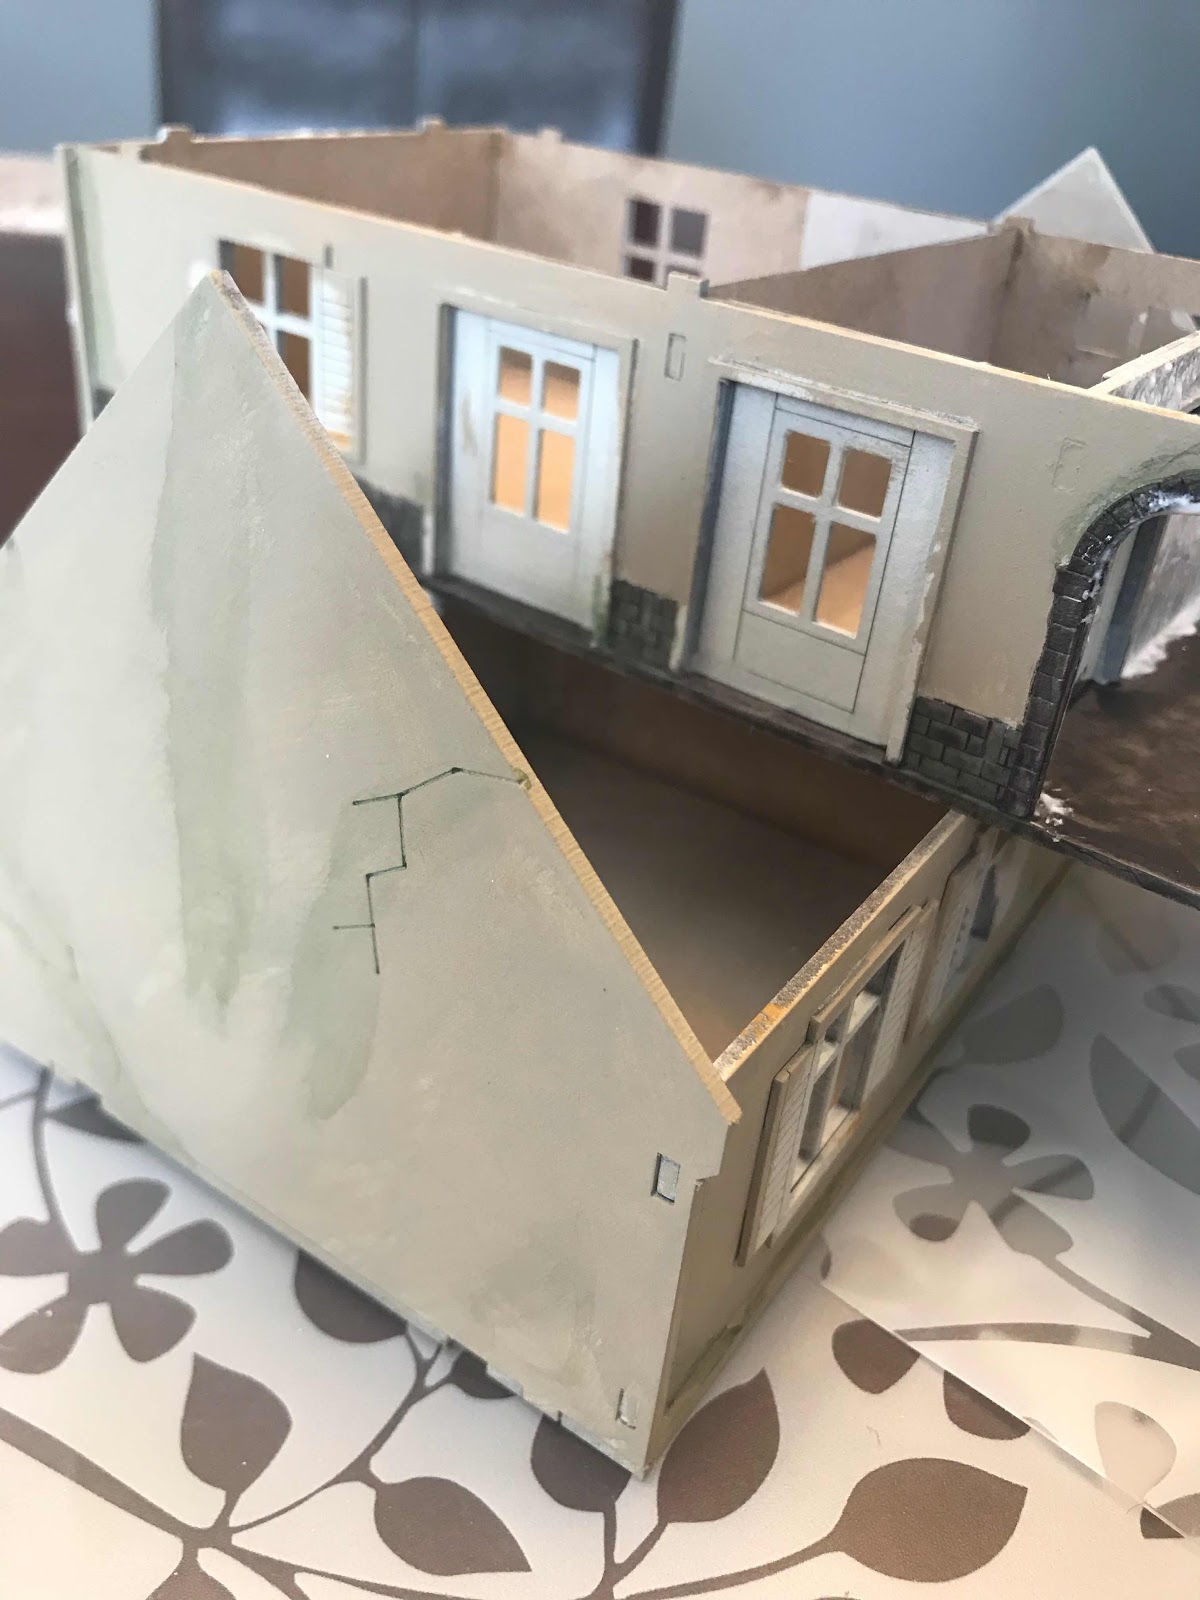
WWI terrain board - finish building both sections. Paint both. ( WTF is this really a “minor project?)
Have Karl finish painting my WWI Germans (under 50 figures-easy).
Have Karl finish painting my Wild West figures (under 50 figures-easy).
Foam brick terrain (about 750 have been made into terrain - needs to be mod podged and painted other 750 need texturing before building.

Would be nice Projects:
Try to finish painting my Frostgrave/Rangers of Shadow Deep, The Walking Dead All our War greyscale project ( purchase saviours and whisperers).
Tackle whatever GW lord of the rings I can (for the boy).
Stay away from anything new (looking at you  Stargrave).

Cheers and good luck to you on your Projects this year!

Tuesday, 19 May 2020

Charlie Foxtrot Big(ger) Buildings


This past Victoria Day long weekend had pretty crappy weather. As such we stuck indoors for larger portions of the time. So what better time to smash some building together.


I started with the "Brasserie". Comes in simple packaging with one page of instructions. The instruction sheet is pretty basic and only high-lights some of the more intricate pieces.


Here's all the pieces. There was no waste/excess material which helps keep the weight down. Although it is a little daunting being different from the usual MDF kits.


Basic building is complete. Bandage on my finger is not related to this project :)


I left the Brasserie façade off as I'm going to texture the exterior.


Here I taped off all the openings so I wouldn't get textured spray inside the building or on the roof.
I'm planning to shingle over the roof so that's not a big deal if paint got on but I want the shingles to adhere properly.


Up next is the Boulangerie. Same packaging with most pieces punched out.


It had interior walls on the main floor which was nice.


Here's a quick pic of the pain components to be sprayed. Again I left off the façade for ease of texturing. I also had to tape off the Juliet balcony above the doors.


The Café De Normandy was the tallest build (3 floors) and had a "L" shape on the ground floor. I would call this building the fiddliest, but it wasn't that bad.


All the bits. This kit had the most pieces by far.


The dormer window isn't glued on. I have the dormer's peak resting on the roof peak while the glue sets up to keep the correct alignment of the pieces.


What I liked:
No excess material meant less time spent cutting things out.
Kits were fairly intuitive. However, some are available on line.
They look great as is, and I haven't textured them yet or added details like doors windows or shutters.


What I didn't like:
A few of the corners on tabs and other small bits where damaged. This happens as there is no packaged/excess material to keep them from hitting each other. But it was all negligible.
Instructions - I'd have preferred a step-by-step guide.


All in all, I was very happy with these kits. Getting the skeletons together, texturing the corners and taping off areas I didn't want spray paint took maybe 25-30 minutes each with most of the time spent filling the corners and taping.


In my next post I'll show why I textured the corners.


I'm going to spend the next little bit tarting them up as I plan on shingling the roof.


Saturday, 16 May 2020

(Temporary Backup) Ticket inspectors, you’ve gotta hand it to them...

Happy Easter everyone!

I worked on my trains yesterday. I’ve been procrastinating. I’ve lost track (sorry) of how long these trains have been sitting station 


Using Renedra sand bags, I built up a little fortification for the machine gunners.


I built them up slowly and they are removable. 

Finished look.


And a view from the front.


I’m going to use specially mounted MGs for the train so it’ll fit better.

Hope everyone is staying safe.

Charlie Foxtrot Initial Thoughts and smaller buildings.

I found some spare time today and managed to put together the workshop, log store, stone shed and extension from Charlie Foxtrot Models.

There wasn’t the usual heavy smell of burned MDF which was a plus. 

There’s lots of detail on the kits as well.

I started with the workshop. Nicely packed in a ziplock bag. Pieces already punched out with helps keep weight down for postage I presume.


Here’s the basic components. No instructions were included. However, the pieces have tabs and with some dry fitting and patience it’s easy to figure out.


Boom! Basic shape is done!


I watched Nick Skinner from TFL fame do a CFM kit and use textured spray. Taping off the inside keeps the insides cleaner. It’s not perfect but it does the trick.


Next up was the extension.


Here’s the pieces. Again zero waste.


I forgot to take a picture of it built and taped off before I took it and the workshop outside to be sprayed.

The log store is the only kit with some greyboard details. I’m not a huge fan of greyboard but it is useful.


Obligatory components picture. Wood detail looks good. Debating on just a brown wash.


Here I used PVA glue to layer the greyboard planks. The only fiddly part of all the kits.


The stone shed. Lots of detail. Another straightforward build so no instructions required.


I like he stamp on the bottom of the piece. It’s a nice touch of brand recognition. My only complaint, if you could call it that is there is not an undamaged door option. 


All in all, 4 very nice kits! Took probably 10-15 minutes to assemble them all including dry fitting pieces.

Some of the holes and plugs were super tight. Some of the edges of the plugs actually split. But it’s all glued together so not a big deal.

Thursday, 14 May 2020

Charlie Foxtrot and Harry Potter

Around the time I was painting the Sarissa large farmhouse and building Chain of Command lists and watching lots of YouTube videos, I stumbled across Charlie Foxtrot Models.

I’d heard of them before and gone through their website once or twice but that was it. I was watching Nick from TooFat Lardies put together a hotel and decided to check them out further.

Well today I heard the doorbell and arrived to see the mailman walking away. I figured it was something I had ordered. My 5 year old pushed open the door and said “look it’s for me” grabbed the box and ran off into the house. (There’s a stamp on the exterior that reads Charlie Foxtrot Models, and his name is Charlie F., so close enough).

After a short foot chase, I got the box back and opened it up.


This will give me 4 medium to large buildings and two smaller ones. Hopefully I can get started this long weekend! Luckily in preparation for his I have some spray cans (textured paint) I purchased especially for this.

Over the last month or so, the oldest has been obsessed with Harry Potter: Hogwarts Battle line of games. We just finished reading the 7th book with him and watched all the movies (books before movies).

I saw that there were several expansion cards so I scoured the Internet. I think we are issuing one.


I enjoy deck builders and Harry Potter so this was a no brainer.

We also played a home brew Russian Civil War game but I’ll post about that this weekend when I have more time.

Tuesday, 21 April 2020

WWII French Farmhouse Part 2

Well, it’s completed. I finished it on Sunday.

Oathmark Dwarf Champion for scale.

Picture of the front. I just need a name for the store. I’m thinking the Farmer’s wife sells excess produce, dairy  and baked goods inside. I want a funny name but nothing too risqué.
I’m thinking the farmer’s name is Jim Appel (je m’appelle, get it, get it?)


Picture of the rear. I might put down a few more droplets of wash here and there. I was also thinking about putting some cobblestones and straw down inside the archway...


But for now I’m calling it done. Pretty happy with how this one turned out.

Saturday, 18 April 2020

WWII French Farmhouse

I’ve been bitten pretty hard lately by the Chain of Command bug.
Ive has paratroop forces for Britain, USA and Germany for quite some time as well as an MDF large farmhouse from Sarissa Precision.

I primed it beige and used Citadel Contrast for the stone work. I brushed on some green wash for weathering and smeared it with my finger.


I wasn’t happy with how this looked so decided to try again.

I got out some trusty spackle and mixed in some water until it was like toothpaste.

I then dabbed it on the surfaces to create a stucco look.
As the building was already assembled, it was difficult to get it consistent around the windows.


Today, with the beautiful weather, I used a medium brown spray paint to lightly dust the exterior walls.

I then used a lighter brown to dry brush the walls, which added depth.

Next I started to paint the windows and doors in white.

I have to finish the sign and the remaining windows and doors. I also have to pick out the stones along the bottom in grey and around the archway.

I’ll probably add some wash down some of the walls to look like dirt and grime.

Here are some  pictures of the progress.


Saturday, 13 September 2014

Building Terrain - Large Farmhouse

Bit of a break since the last post. I built the Sarissa Precision Large Farmhouse sometime last week but finally got around to talking some pictures. 

On to the review. Another nice flat pack piece of kit. Three (or four, oops it's been a while) sheets of 2mm MDF and a sheet of 1mm card.

Again a nicely laid out diagram and exploded diagram for easy installation.

The kit went together pretty easy. I read a review that stated the floors and roof have little tabs (that clip it all together) that are a pain but I didn't find it a pain. It separates quite easily.


Finished. Looks pretty good.


With the roof off. Just two separate rooms.


With the second floor off. One large room, one small room and an overhang.


All three pieces separately.


I really enjoy Sarissa Precision kits and look forward to getting many more. The 1mm card pieces were fiddly. Especially the archways.

Thursday, 28 August 2014

Building Terrain - Western Wagon

I managed to find some time to put together the Sarissa Precision MDF Western Wagon. It comes flat packed and is really quite a small package.


Now onto my mini review:


Inside is a 1 page instruction manual with the overall picture (above) and the exploded diagram (below)


The kit comes on one single sheet of 2mm MDF.


I noticed that all the little punch out pieces are excellent for battlefield debris/bricks etc .

One view of wagon. There is also a long piece of MDF that attaches to the bar pictured between the front wheels. As I'm not going to attach this wagon to any animals I'm not attaching the bar. Forgive my wagon ignorance.


Reverse side


All in all, another easy kit by Sarissa. No real fiddly pieces. The lack of details inside the wagon is irrelevant as I plan to have hay in wagon bed.